The New Coop
- Ruth
- Jul 24, 2023
- 2 min read

It's about time! Our chicken coop was in a pretty sad state (I wish I had pictures but we got rid of it before I thought to take any). The paint was peeling, there wasn't very good insulation for our cold winters, the window kept falling out, and the nesting box door was warped and wouldn't close tightly. Lastly, my son really wanted to sell eggs and in order to do that we would need more chickens and thus, a bigger coop.
The current coop measured 4x12 and we found plans for a shed that would end up being 8x16 (We of course modified it). I wanted it to be able to house the feed, bedding and other random supplies. The chicken housing area would be 8x12 with a storage area being 4x8.
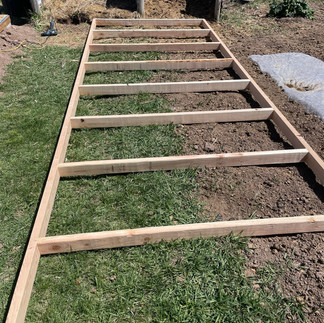
First, we built up the area quite a bit since we flood irrigate and didn't want to flood out the coop.

We leveled everything and added some foundation block.

Next, we started the framing process.
I wanted to have access to the eggs from outside so we made sure to frame in a box specifically for the nesting box.
We framed in the roof, added plywood sheets for siding, added a metal roof, and trimmed all the seams.
The door was made with scrap materials and ended up being SUPER heavy!


We caulked all the seams and windows and then primed everything. The paint color is Sherwin Williams White Duck (hopefully the chickens are too offended!) and the stain is English Chestnut.


I wish I could explain how we built the automatic pop door but it was actually a very complicated process and all I know is that is works! We used an actuator and a timer and a relay. My husband was the one who figured it all out!


We love it and I think the chickens love it, though I don't think they realize how spoiled they are!
We have yet to add a fun sign in the front, but for now, it is very functional and aesthetically pleasing.
Wow! That was a lot faster to write about than to actually build!


![[Original size] Simple Little farm.png](https://static.wixstatic.com/media/2b17eb_c640f1b7ead04f70a365a989125ce2ef~mv2.png/v1/fill/w_292,h_292,al_c,q_85,usm_0.66_1.00_0.01,enc_avif,quality_auto/%5BOriginal%20size%5D%20Simple%20Little%20farm.png)


Kommentare